If you're using Webflow for your website and want to boost your online visibility, understanding how to create schema markup is crucial. In this article, we'll delve into schema markup, providing a detailed guide on what it is, why it's important, and how to add it to your Webflow website.
What is Schema Markup?
Schema Markup is a type of structured data, or microdata, that allows you to enhance the information you present to search engines about your website. You can add it to your website's HTML code to provide additional context about your content to search engines. It's an integral part of an effective SEO strategy as it can significantly enhance your website's visibility and performance in search engine results pages (SERPs).
But keep in mind the benefits of schema markup are not immediate. Rather, it enhances how your website appears on SERPs, making it more appealing and, thus, more likely to be clicked on by potential visitors.
The Importance of Schema Markup
In the digital age, having a website is a necessity. But to truly leverage your web presence, it's crucial to ensure your website is easily discoverable and accessible to your target demographic. That's where schema markup comes into play. By implementing schema markup into your website, you can enjoy a myriad of benefits:
Enhanced Click-Through Rate (CTR)
Schema markup provides search engines with more detailed information about your website, allowing them to display more relevant results, leading to a higher likelihood of users clicking on your website snippet link when it appears in search engine results.
Greater Visibility in SERPs
By offering additional information about your website, schema markup can help your site stand out in SERPs (Search Engine Result Pages), giving you an edge over competitors.
Rich Snippets Enhancement
Rich snippets are additional information about your website that appear in SERPs. These snippets offer more context about your site, making it more appealing to users. Schema markup is vital for creating these rich snippets.
Boost in Local SEO
Schema markup can enhance your local SEO by providing search engines with additional information about your business, such as your address, phone number, and contact information.
Improved Voice Search
As voice search becomes increasingly popular, schema markup is essential for ensuring search engines can accurately interpret the context of your website and respond to voice search queries accordingly.
Incorporating schema markup into your website, you're helping search engines better understand your content, providing higher visibility in search results, improved user experience, and, ultimately, more online success for your business.
Google and Schema Markup
Google utilizes schema markup to understand your website's content better and provide more informative search results. When you add schema markup to your site, Google can use this data to create rich snippets in search results, including additional information such as ratings, reviews, and pricing.
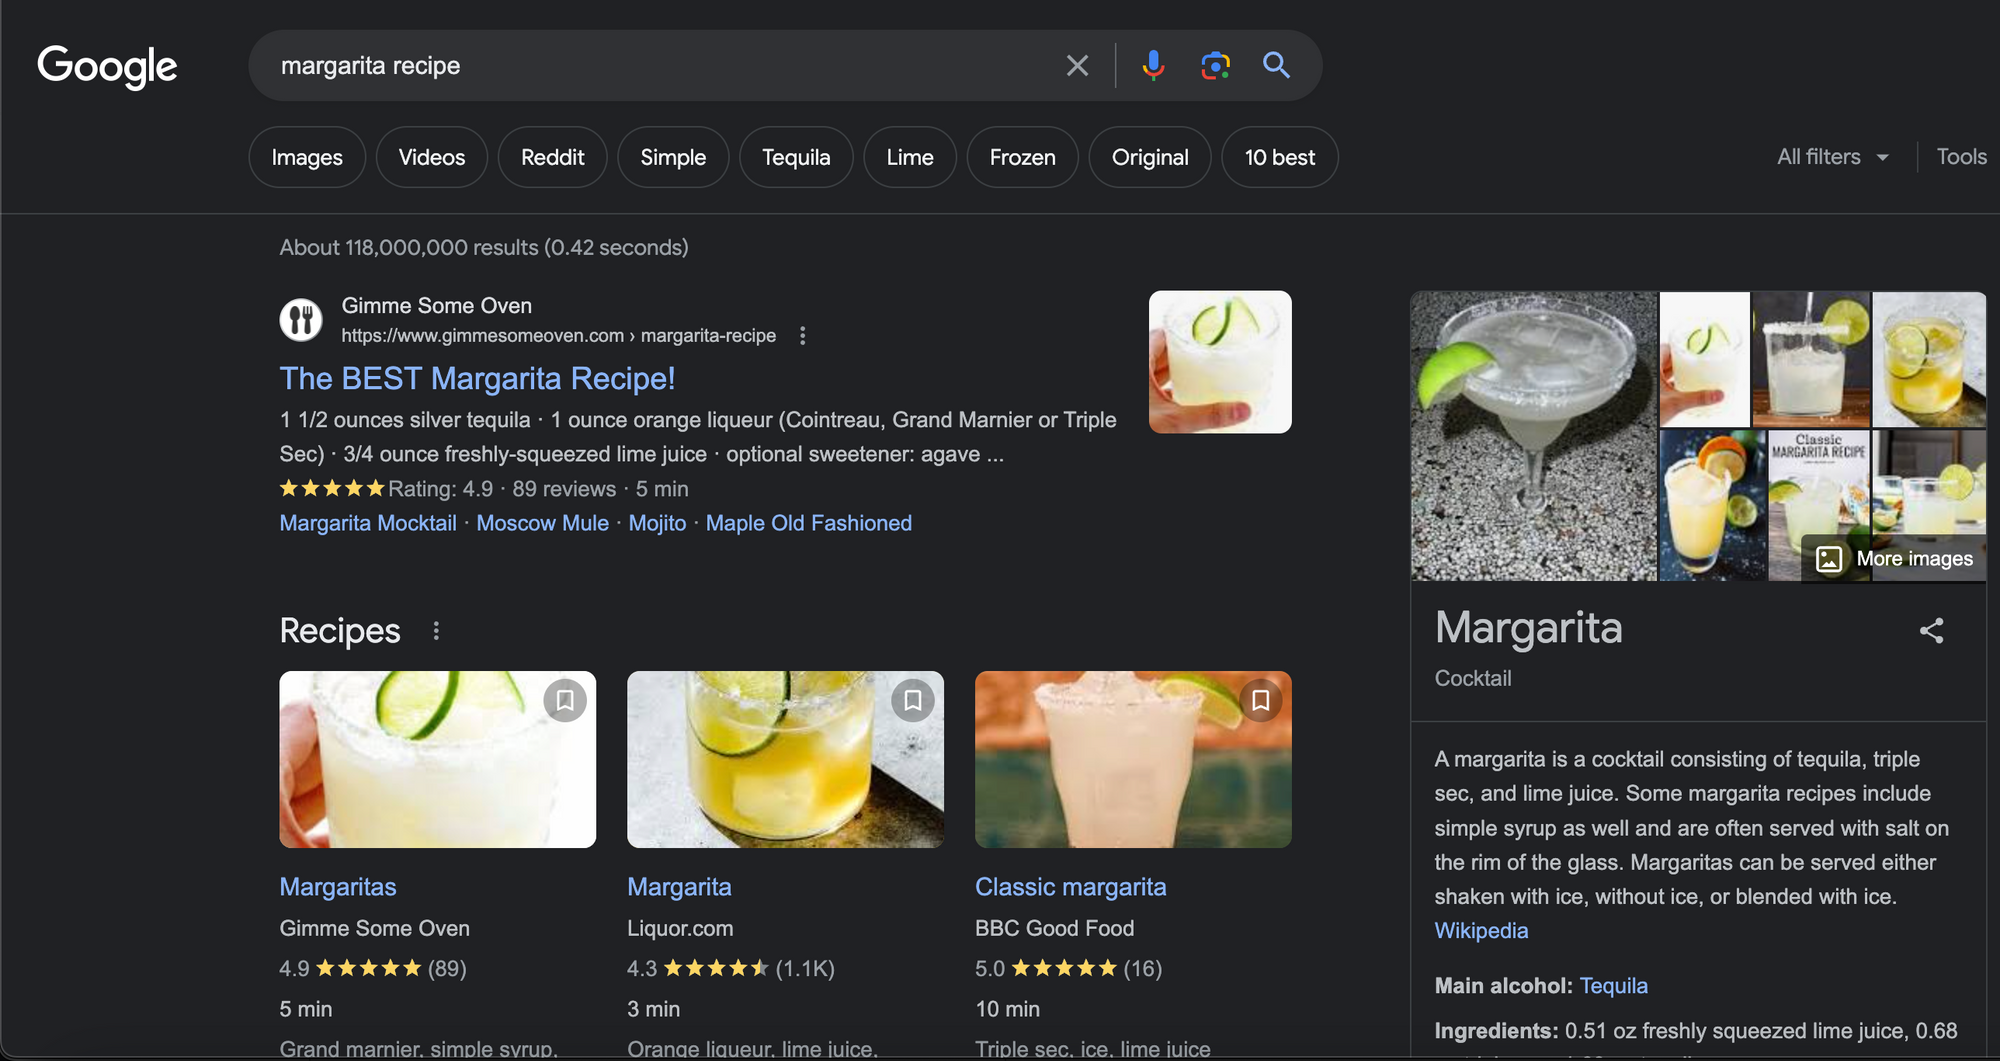
For example, suppose you have a recipe blog and add schema markup to your recipe page. In that case, Google can use this data to create a rich snippet showing your recipe ratings, cooking time, and ingredients, making your recipes more visible and attractive to potential customers.

The Case for Adding Schema Markup to Your Web Pages
Adding structured data to your website can lead to rich results, which are more enticing to users and may inspire them to interact more with your site. Apart from the benefits highlighted above, there are several other compelling reasons to add schema markup to your site:
Increased Presence in Search Engine Results
Schema markup can help your website stand out in search results. By offering more detailed information about your offerings or organization, you can gain a more prominent presence in search engine results, leading to more clicks and traffic to your site.
More Accurate Search Results for Users
Schema markup can enhance the accuracy of your search results. By providing more context about your content, you can help search engines understand your site better, leading to more relevant search results for users and increasing the likelihood of them finding what they're looking for on your site.
Enhanced Website Accessibility
Schema markup can make your website more accessible. By offering structured data, you can help search engines better comprehend your content, enhancing the accessibility of your site to individuals with disabilities and ensuring that your website is inclusive and accessible to all users.
Future-proofing Your Website
Schema markup can help future-proof your site. As search engines evolve and become more sophisticated, structured data will likely become even more critical in aiding websites to rank well in search results. By incorporating schema markup now, you can ensure that your site is well-positioned to leverage future changes in search engine algorithms.
Here are some case studies of websites that have successfully implemented structured data:
- Rotten Tomatoes added structured data to 100,000 unique pages and saw a 25% increase in click-through rate for pages enhanced with structured data compared to pages without structured data.
- Rakuten found that users spend 1.5x more time on pages that implement structured data than non-structured data pages and have a 3.6x higher interaction rate on AMP pages with search features vs. non-feature AMP pages.
- Nestle found that pages that show as rich results in search have an 82% higher click-through rate than non-rich result pages.
Source: PaddleCreative
How to Create Schema Markup for a Webflow Website
Adding schema markup to your Webflow website is a relatively simple process that can be accomplished in just a few steps. This process involves identifying the pages you want to add schema markup to, using a schema markup generator tool to create the appropriate schema markup code for each page, and then adding the code to your Webflow site using the custom code editor.
Here's a step-by-step guide to creating schema markup for your website:
- Identify the pages to which you wish to add schema markup, such as a blog or service page.
- Use a schema markup generator tool to create each page's appropriate schema markup code.
- Open your Webflow website in the CMS and navigate to the page you want to add schema markup to.
- Click on the page settings icon in the top bar and then click on the "Custom Code" tab.
- Paste the schema markup code into the "Head Code" section of the custom code editor.
- Save and publish your changes.
Remember, adding schema markup to your site is just one aspect of an effective SEO strategy. You'll also need to optimize your site's content and structure, build high-quality backlinks, and regularly update your site with fresh and relevant content.
Using Merkle Schema Markup Generator to Generate Schema Markups
Merkle Schema Markup Generator is a free tool to help you create schema markup code for your site. It offers a straightforward way to generate the appropriate schema markup code for your site.

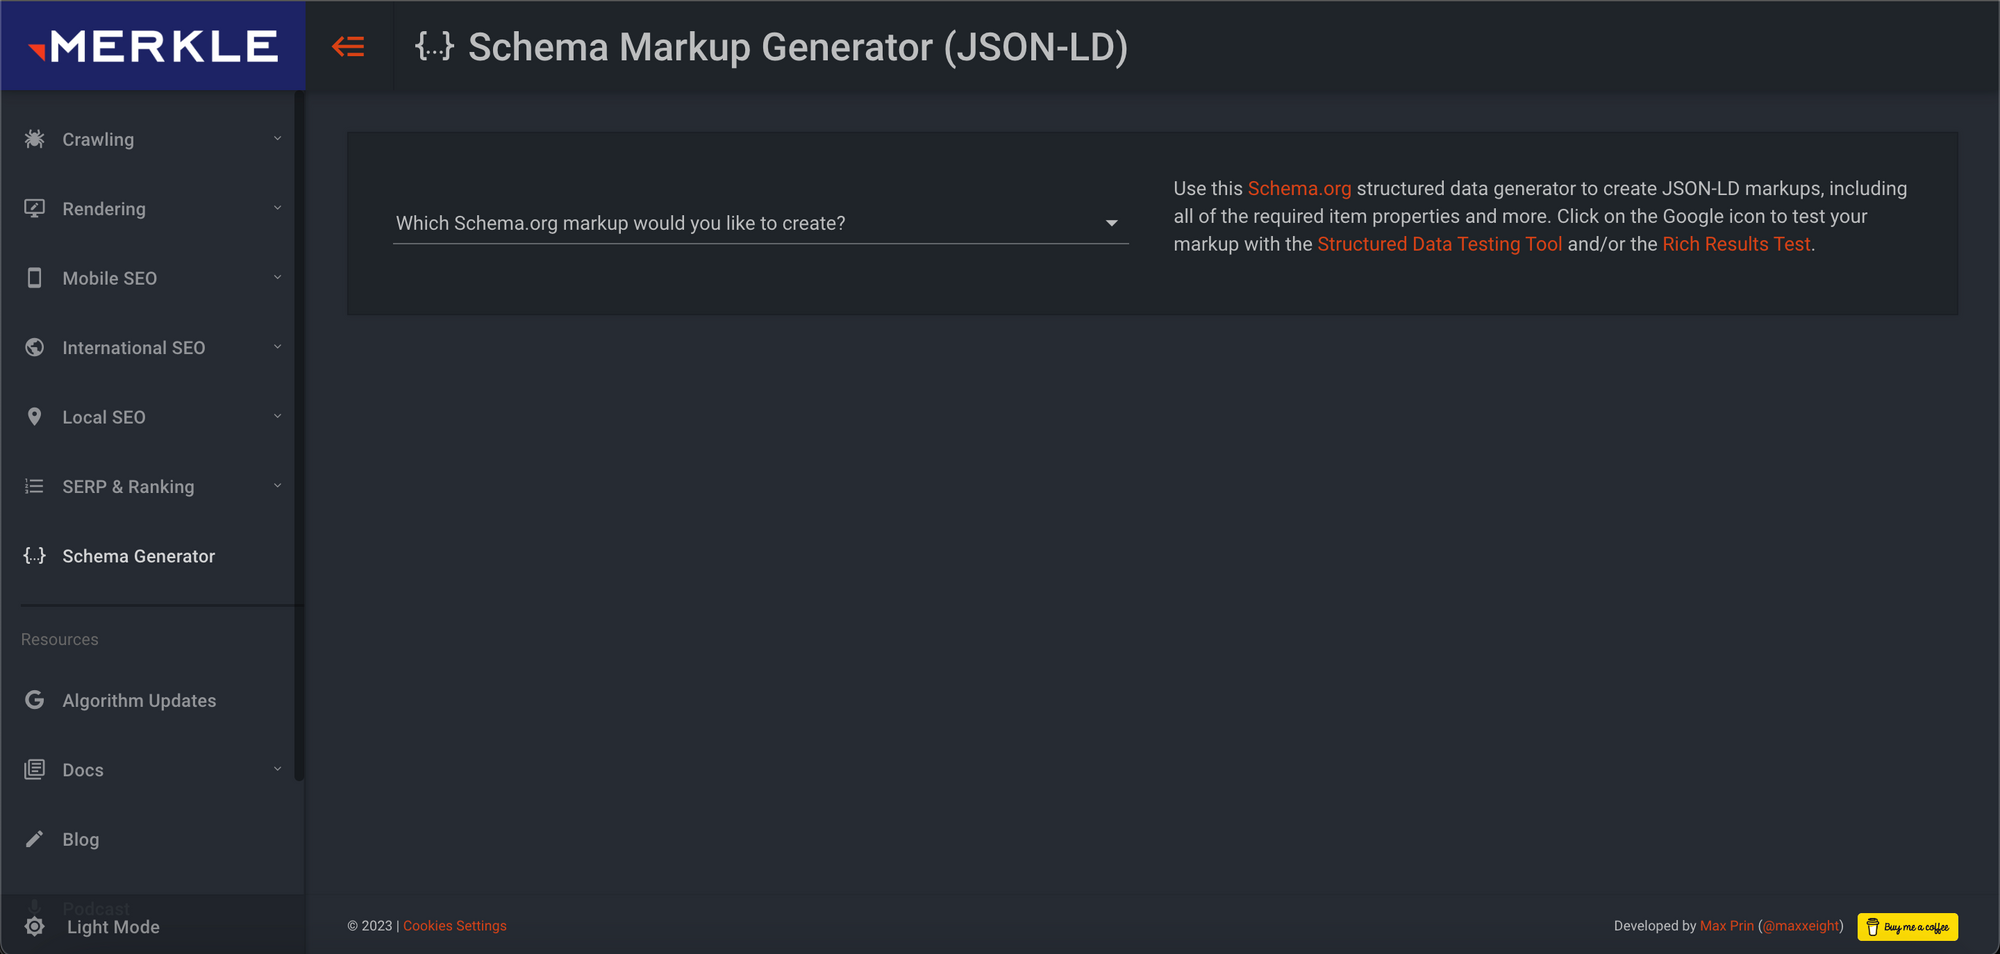
To use the tool, select the type of content you want to create schema markup for, fill in the relevant fields, and click "Generate." The tool will generate the appropriate schema markup code for your content, which you can copy and paste into your website's HTML code.
Here's an example of how you would use Merkle to create a schema markup for one of your site's blogs:
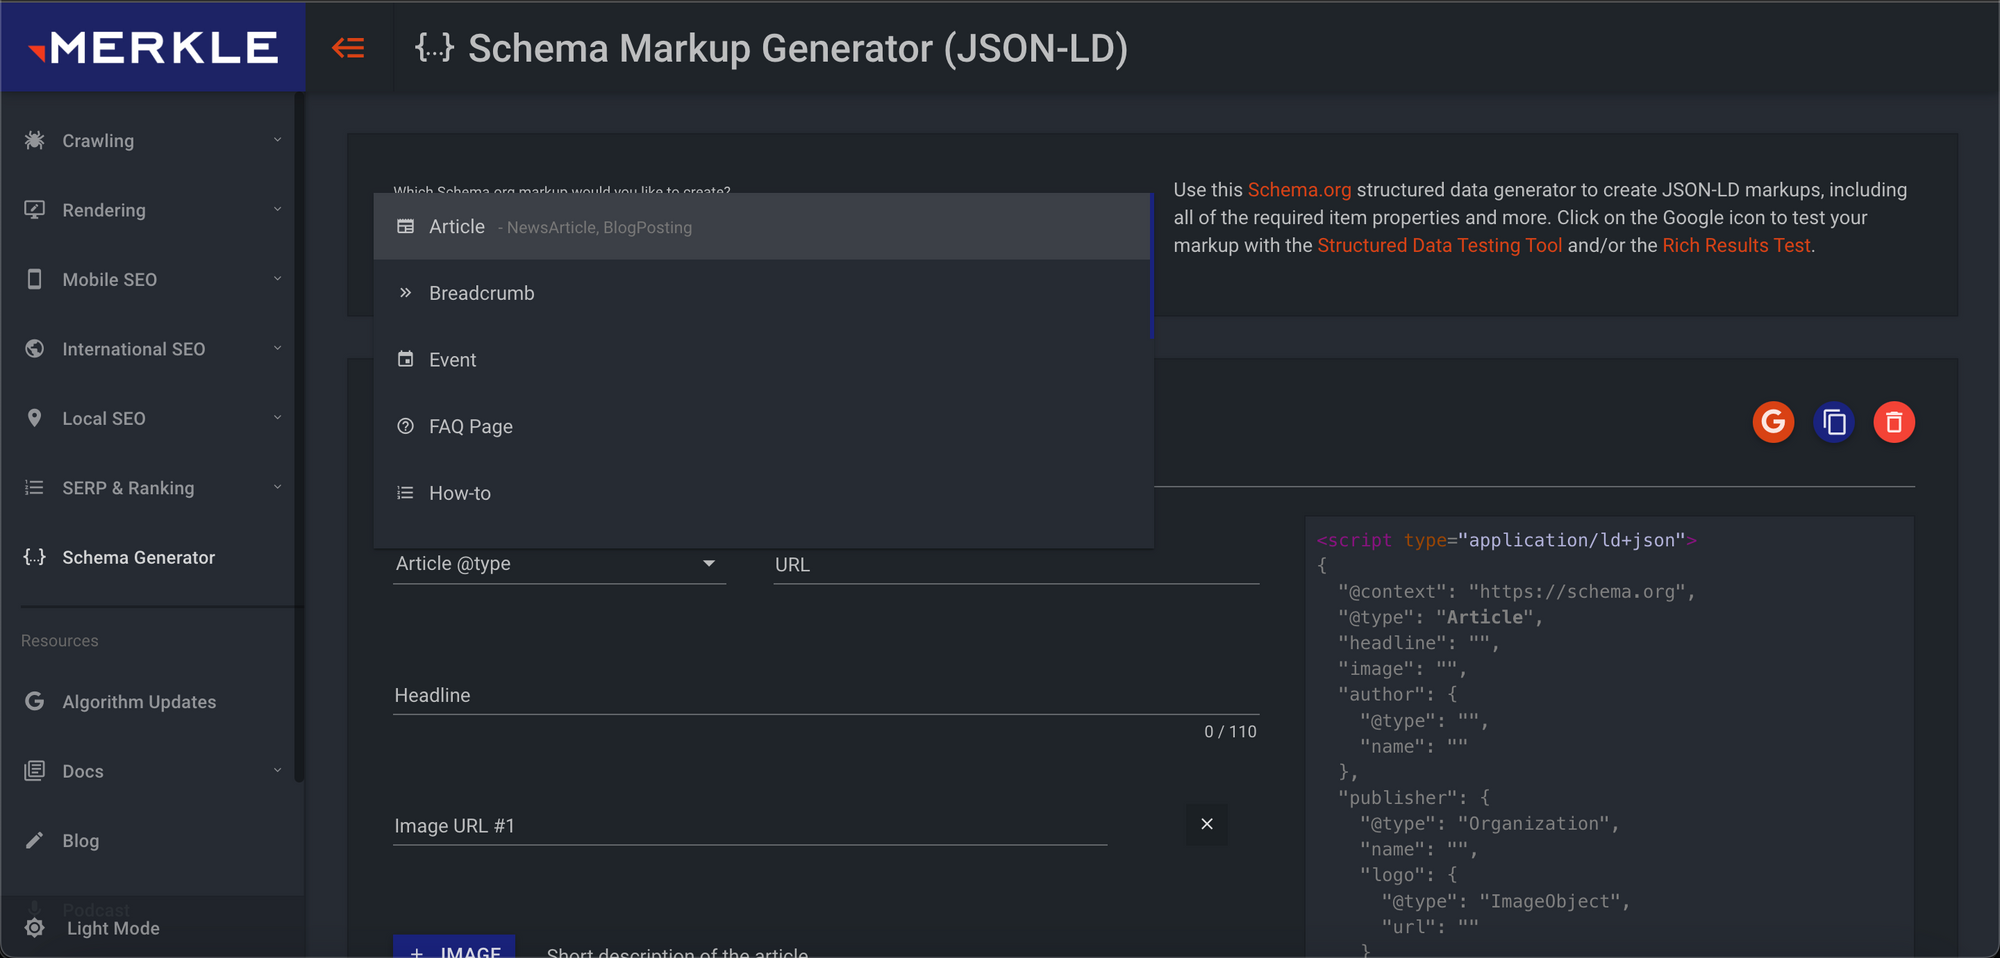
- Open Merkle on your web browser and select "Which Schema.org markup would you like to create?" at the top of the screen. Here, you'll find options like Article, Breadcrumb, Event, FAQ Page, How-to, Job Posting, Local Business, Organisation, Person, Product, Recipe, Video, and Website. Click on the category you're adding, e.g., Article.

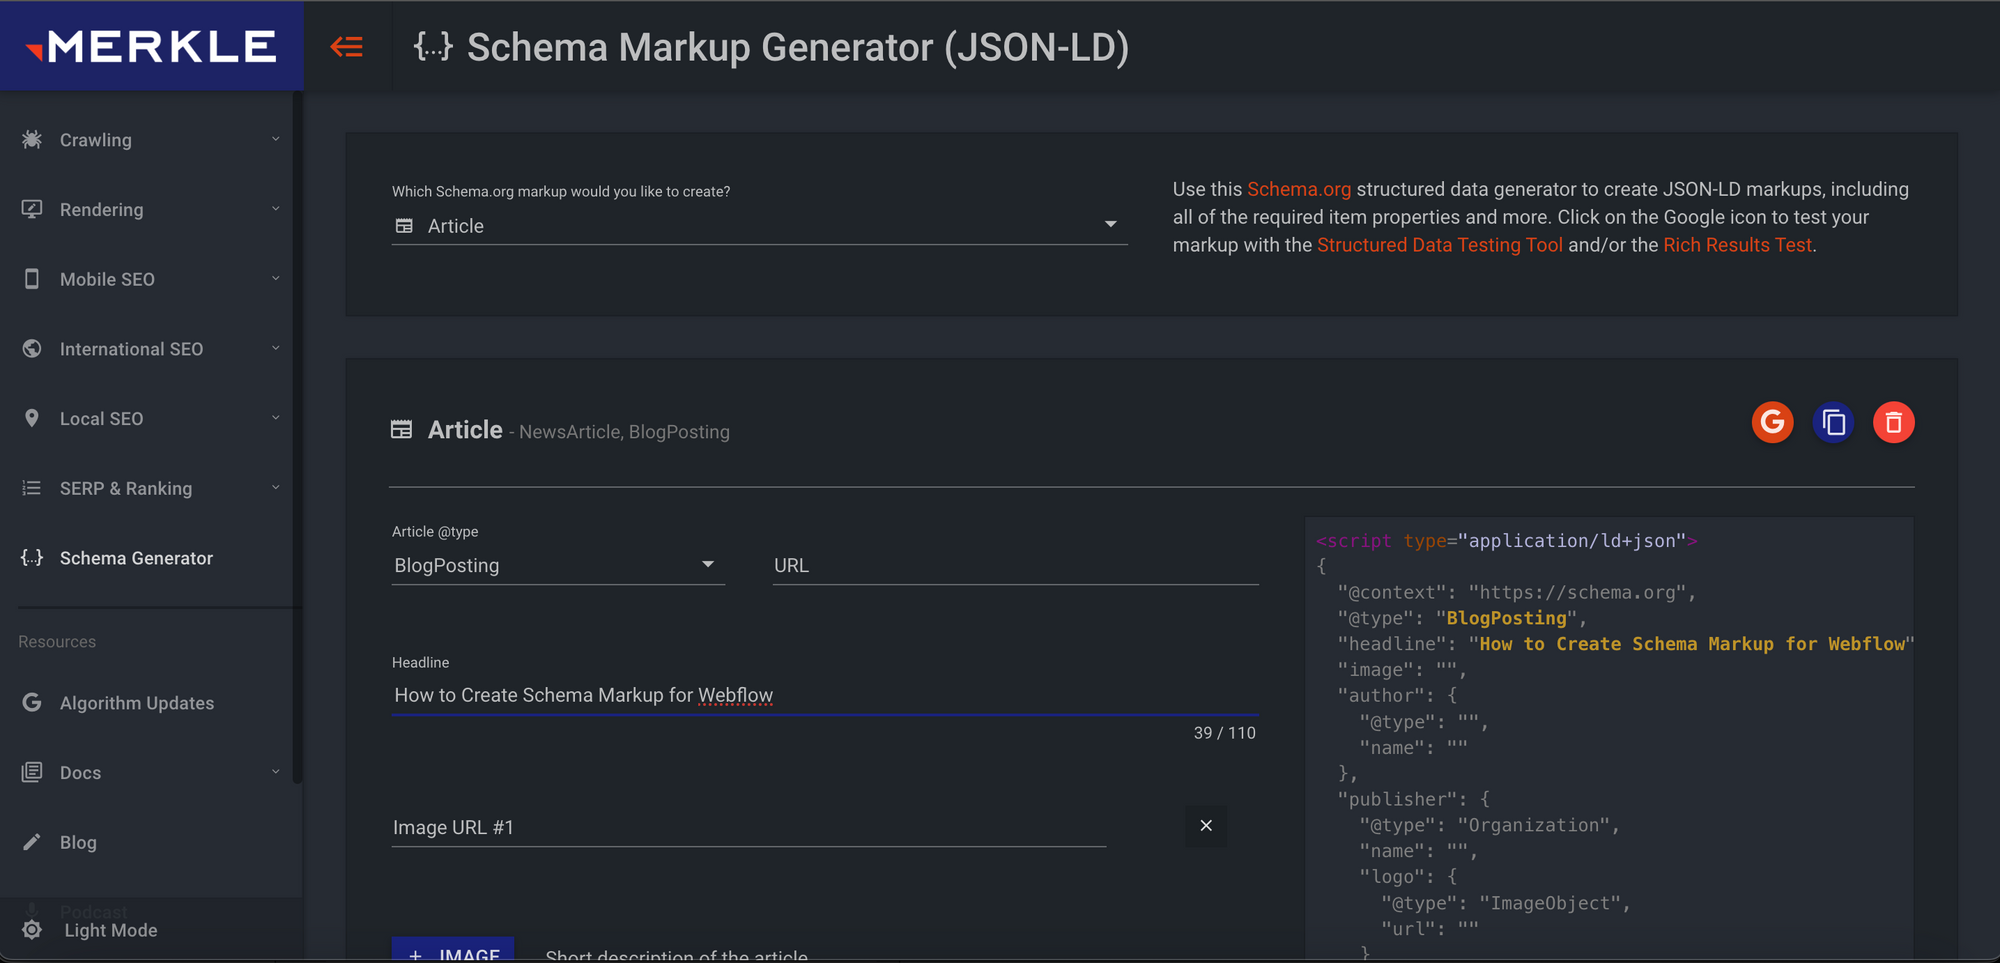
- Once you've selected your category, you'll be prompted to fill in a series of fields, e.g., article, type (article, news article, blog posting), Headline, Author, etc. You can copy and paste the info from the blog page you're creating the schema for into these fields. If there are areas that don't apply to you, such as 'Author URL,' you can leave these fields blank.
- As you fill out the fields, the tool will start generating custom code on the right side of the page.

- Once you've filled out all the relevant sections, the code on the right will be ready for you to implement into your Webflow page. Copy and paste the code into your blog's 'Before tag' section (in the Webflow CMS).
- Repeat this process for other pages on your site by changing the key information, i.e., URL, Headline, etc., using the 'Add Field' button in the top right corner of the code box. You can generate dynamic schema data by using fields from CMS items in Webflow to inject data into the Schema code.
- Be sure to test that everything is working as it should. The Rich Results Test from Google and the Schema Markup Validator from Schema.org are useful free schema testing tools.
By using Merkle's Schema Markup Generator, you can easily add schema markup to your Webflow website and improve your search engine visibility, search results, and website performance.
Conclusion
In conclusion, adding schema markup to your Webflow website can significantly improve your search engine visibility, attract more visitors, and enhance your website's performance. With the right tools and techniques, you can easily add schema markup to your website and start enjoying the benefits today.
For further assistance and scaling of your Web3 with AI-powered organic growth, don't hesitate to contact Attirer organic growth specialists.


